Search This Blog

Showing posts with label Starter Motor. Show all posts

Fitting a New Starter

23rd May 2014
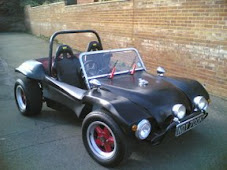
My Buggy had been not getting a lot of use recently as I was plagued by starting issues. This resulted in using a screwdriver to start the vehicle. I had previously changed the starter switch and new that this had been ruled out.  I had tried to make a new starter from two old ones swapping the coil. This was not working.  The buggy would randomly start and not start and I could not figure what was happening.

I met some one with an RTX starter who recommended this to me as the cost of this starter was only £50.00 as opposed to £80.00

Eurocarparts have an eBay store were they sell these units for £47.99. I bought and fitted the RTX starter the bush size was the same as my existing starter.

I am very pleased with this RTX unit this is the first time my car has really wanted to start properly. I would recommend them to everyone as they seem to be ball raced and will start on a much lower battery level.

Replacing A VW Starter motor bush

24th March 2012
I knew my starter motor had failed with a broken winding and thought that it was likely that this was due to a worn starter motor bush that had caused the windings to hit one of the magnets.

There are two types of starter motor bush one which is a 12v bush and another which is a 6v bush that converts to a 12v starter motor. It is important to get the correct one.

The starter motor is fastened by only two bolts top and bottom the top goes right through the engine casing whist the bottom is a short stud. It is very important not to loose the top bolt as it has an unusual D shape end. Once removed the hole in the gearbox can be seen and the bush contained in the centre. A 12mm tapered tap can be wound into the bearing by hand so that it starts to bite I used a pair of grips on the end of the tap so that it could be turned in the small space as the tap handle did not have enough room to turn. You need to keep turning the tap until it bottoms out on the hole. This need quite a few turns to complete but eventually the bearing moved up on the tap and out of it hole.

You can see from the picture right that the bearing has been wound onto the tap with the depth of the tap protruding from the end of the bearing being the depth of the hole from which it came from. I tried the new bearing on the end of the tap and noticed that it slipped easily on and off without interference. I decided that I could use the tap to replace the new bearing . I greased up the new bearing and slid it onto the tap. I removed the adjustable and sat the whole assembly in the hole. I used a rubber mallet to softly tap the end of the tap and the new bearing into place. The tap was then slid back out to leave the bearing in place see picture right. This whole procedure took a very short time and to be honest I would recommend replacing this bearing if you are replacing a starter motor. The replacement starter motor was refitted . It can take a little time to mesh the gears when refitting this may involve using someone to turn the engine or you will have to move the starter gear and replace the motor until it goes completely in. The two bolts were replaced and torqued up. The wiring on the back of the solenoid was reconnected and the job was complete.

Dismantleing a VW Starter motor

23rd Feb 2012

My starter motor had been sourced from Volkszone and seemed to be taking some considerable time to reach me due in some part to the snow and late posting.

I decided that I would remove the old starter and see if the damage was repairable . The starter motor is fastened by only two bolts top and bottom the top goes right through the engine casing whist the bottom is a short stud. It is very important not to loose the top bolt as it has an unusual D shape end.
Link

The starter motor can be took part very easily. The end cover is secured by two small screws . This covers the main shaft which is held in place by a U shape washer and several shims. The Shims are very important as they set the amount of float on the starter motor. Once these have been removed the two larger bolts can be removed allowing the outer casing to be withdrawn from the main shaft. The four carbon brushes could then be inspected in the starter motor cover. Mine was in very good shape and I knew this could not be the problem . I turned my attention to the main shaft and the copper windings and the contact areas on the commutator . It is noticeable on my copper windings that one of the copper windings is broken and does not make contact with the starter motor. I had found the reason for the motor failure. Several days past before my replacement starter motor eventually turned up . The package was split open and the delivery agent for Parcel Force stated it was not suitably wrapped. However the item had not suffered any damage and power up from a battery and starter cables quite successfully.


The starter motor was painted but appeared to be rusting underneath the paint. I decided to clean the starter motor down with and electric Wire brush. The paint and rust stripped back quite easily leaving a smooth bare metal appearance . I painted the Starter motor and refitted my old solenoid to the side as I knew my solenoid was newer. I tested the starter motor again and it all functioned correctly.

My starter motor windings had failed and I knew I should replace the starter bush before replacing the starter on the car.