Search This Blog

25th Bugjam 2012

23rd July 2012
The car problems were at the back of my mind when I set out car loaded to Bug Jam at Santa Pod with a group of good friends.

My car was running poorly but I hoped it would manage to cope with the 6hr drive up the M25 and M1 . The weather was fantastic and the drive was a good one with the group all traveling up together we had a pretty fantastic trip. The picture above was taken whilst driving through the main gate of Bug Jam and I bought a commemorative photo as proof that my car made it the whole trip. The long trip up the motor way gave a lot of time for engine testing and to see what was going on with the engines poor running. It was noticeable the the buggy had to be nursed over 45mph and would only go faster if the Accelerator was pushed several times. This then gave a gain in speed that would get the car running faster up to 70mph. It seemed as if the engine was running to lean and that I knew I would have to address on my return. We arrived at BugJam around 6:00pm and on arriving at the camping areas my buggy quit. I would find out later that this was due to a 20amp fuse blowing. As the car had quit this is where we decided to camp which was a fantastic site. We quickly pitched the tents and spend the next 3 days and nights having an awesome time. If you have never been to Sata Pod or BugJam then you should go as its a fantastic event with too much to see. The Drag Racing course was fantastic and I think it has the look of my next challenge on it to get my car upto speed for next years event and run the car on the drag strip.

Refitting a Broken Valve Spring or not due to non delivery from CoolAir

21st July 2011
I got my cylinder head off yesterday that had the broken spring in it. The spring in two pieces along with the valve are shown in the picture opposite. The spring had sheered right through two coils down and the surfaces matched exactly. This is a fairly major failure in this part . I had thought I had used second hand heads but in fact these heads where 040 heads I had bought some years earlier for my engine. I decided to go to GSF and get a new inlet valve and luckily these where standard 35.6mm valve heads with an 8mm stem and strangely GSF had them in stock. It is a mystery to me what GSF stocks as they always only seem to have half of the parts I require for example yesterday morning i spend £68.00 on parts a Valve Compression tool and some valve springs. GSF could have had all of this but instead only had £10.00 for two collets and an inlet Valve . I have to wonder why this is but am happy that my local branch is expanding and they will have more stock room.

The Valve compression tool I bought was a bench mounted tool. which is very simple to use. You simply place the head on the base with the valves in and the arm runs along a track to alter its position to put a valve in in turn. with the spring and spring retainer on the valve the compression tool compresses the spring so that the two collets can be inserted. This was very straight forward and I was very impressed with it as a tool that actually does what it should do for a change.

I decided as I had the tool I would clean up the other valves in the heads before putting the head back on this involved removing each of the collets from the other valves and taking out the valve and cleaning it down with carburetor cleaner and a wire brush. The valves where then re fitted to the head one by one until the head was re assembled again . The head was then refitted to the engine. I new I would need to visit GSF again as I needed a new set of carburetor and exhaust gaskets. With the GSF High quality gasket set in hand I was waiting for a UPS delivery all morning to deliver my springs and tools. Sadly this was wasting my time so I decided to paint some of the tin wear back up with black to refresh it a little.

I got a phone call from CoolAir VW a little while later as I had called as was getting worried as nothing had arrived. They told me that nothing had been shipped out to me there had been a problem with an email not being sent and although apologetic I was told I would and could not have my parts today. This meant I could not get the car back together for bugJam.

I was so cross about this it started me thinking . I had an old valve spring compressor that was made by Laser this would not fit my beetle heads and without the proper equipment arriving I decided to try some customization of this item to see if I could do anything with it. You can see I used my angle grinder to remove to nicks from the very front of the tool so that it would not interfere with the lip on the cylinder head. I then filed it so that it had no rough burrs and was smooth and kind to the soft aluminum head. I found that the scissor action of the clamp was quite difficult yo use. I also found that when you had it clamped onto the head that you could not increase the pressure further by tightening the screw as the bottom of the screw just slid of the head of the valve. This was rather disappointing, however I soon found that if I tightened up the thread hard . I could not close the cramp but I could use a rubber mallet to hit the leaver to make it force the spring to compress. This was a good find 
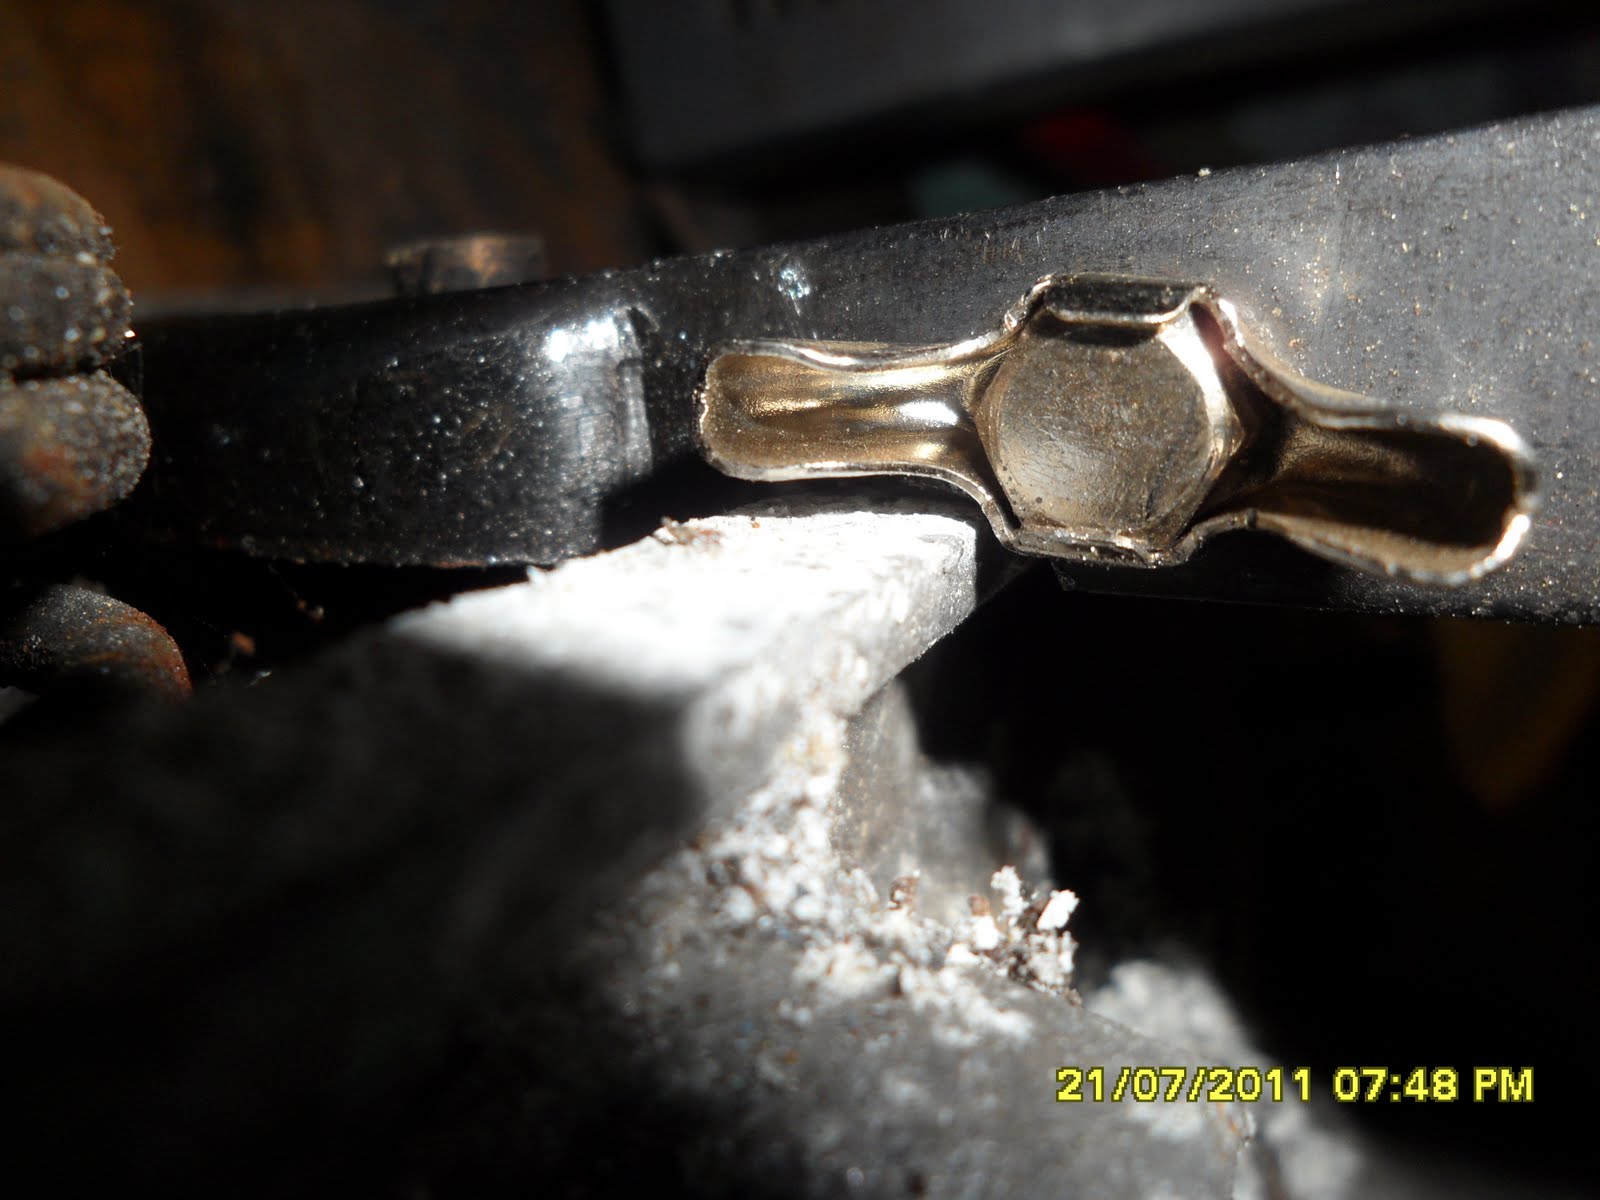
as it pulled the spring up tights so that the collets could be removed. The image right shows the top of the tool and how close it is to the edge of the head even with the section removed from the jaws of the compression device. Without this removed the device could not compress the valve enough to allow the collets to be removed. This was obviously a flaw in the design. The collets were then removed and the apparatus was removed to allow the spring to be released. I took the spring and cleaned it up with a wire brush and then wd40. I then placed the new valve old spring and new collets into the head with the same process only i had to balance the device on the compressor before i could compress it this turned out to be considerable easier. The picture right shows the valve inserted in the head and the head pushed onto the cylinder heads. This was then bolted back on turning up the nuts in a diagonal pattern so that it pulled the head up evenly. The newly painted tin ware was then placed under the fan housing and then screwed down tightly. I then inserted the Alternator with the fan still on the back into the housing and strapped it down with the strap before doing up the tin ware screws in this way i could ensure that the fan spun without hitting the housing. I found i needed to pull it forward before doing up the strap to achieve this. When I had the alternator bolted in then I did up the tin ware screws. I then put the carburetors back on using new gaskets . I put the cross bar in whilst the carbs was loose this gave just enough room to get it in so they bolted up with it in place. Whilst I had the engine in bits i Changed my Distributor back to a VAC model and connected up the engine electrics and fuel eager to see if this had changed anything.

My Buggy Engine running .


The initial run was much smoother and the car ran better. I took the car out for a run

The initial Run


I returned finding that it would not idle when it was hot. I readjusted the idle screws to get it to idle and left the car in its garage to cool down for the evening. I was still very cross with CoolAir Vw they did appologise but I was very upset that they new I needed my parts to get to Bug Jam and there had obviously been a failure in their systems.

Dropped inlet valve spring on no. 2 cylinder

20th July 2011
My engine had been running a little rough and I tried everything I would do normally to get it to run better. I decided that I would have to set down and work methodically to find the problem . I started the Valve timing first steps as detailed already on my blog here, you can find it or many other problems by using the search bar at the top of this page.

It was immediately noticeable that the inlet spring in No2 Cylinder had sheared in half and the spring was held in place in the head. This was a nightmare as I was due to travel with the car on Friday. I knew this was a routine job and had to buy new parts and have them delivered and fitted in two days.

The unfortunate problem of using second hand heads as you can not foresee this type of problem occuring as it is always possible the parts are not as strong as they should be. As everything else was new on the engine this was the weakest part and as such is probably why it failed.

I ordered a new valve compression tool and a couple of valve springs and collets that would come the next day. I did not know if my Valve, piston or cylinder were damaged.

This would really be a test of my skills and covering new ground on this blog I would have to replace a valve spring. Bug Jam was looking like it was evaporating as my chances of going were looking slimmer every minute.

I started in the afternoon to take the engine down starting with the exhaust comming off first on both sides and then the carburetors an linkage. This allowed the screws for the tin wear and fan housing to be undone. With the engine in the car there is no way to remove the fan housing unless the oil filter is undone so i lifted up one side to allow the engine head tine wear to be taken off the one and two cylinders. This then gave access to the cylinder head. The eight bolts were then undone and the head could be pulled off. The top of the piston was ok and the spring damage was now very visable.

Fitting Side Pods

16th July 2011

The day had had a rainful start and for once I could not say I didn't ask for it . I had pitched my tent in the garden to see if it would leak hoping it would rain to test it. I just had not bargained for the torrential rain that came down in the morning, all though this was good to test the tent it was not good for the car as I still wanted to improve some items before the Friday Deadline . Time was disappearing fast and I had a few jobs to to before I would be happy with the 200mile trip to Bug Jam 2011 I had ahead.

I had previous sprayed up the side pods and although had not completely made my self happy with the finish I wanted to fit them to ensure that they fitted after the alterations.

The side pods are GP side pods that I have cut about and now made my own as they were now 80mm taller than they originally was. It was my intention to fit some side air scoops but I thought that I would probably do this at a later time. The stainless brackets I had manufactured and used before where excellent and I managed with a struggle to get the side pods fitted. I fitted the side pods on with three bolts but thought that I would add some more later in the week if time permitted.

I also started to look at my temperature gauge which was not reading correctly after I had bought another sender having lost my VDO original. The new Sender was a Lucus SNB16 and was up to 180 degrees C it gave a resistance of 1.507 K Ohm at 15 degrees C. I knew my gauge was a VDO temperature gauge but could find no documentation for it I figured if I had a 1k pot I could put it inline with the sender and calibrate the temperature to my car temperature gauge for ambient temperature. I hoped I would have time to do this before Friday. I was also starting to work about the petrol cost for the some 400 mile round trip and figured it would be about £100.00 for the cost of the petrol to do the trip.

Solving poor acceleration problems whilst out.

15th July 2011

I decided that I would renew my accelerator cable before bug jam and this is such an easy procedure I will not cover it here. I was still having battery charging problems and also renewed my alternator wire to the starter motor. This was really because the old wire was to thin and had been burnt on the exhaust. I had to jump start the car so I went to a friends house to see if he wanted to come out with his buggy to drive about and test the vehicles and check for any potential problems. As I arrived at his house in the buggy I had experienced some problems on route with the car bogging down. It felt as if I was never getting first and second gear unless I was stationary first. I decided to check the coupling between the gear shaft and the gear box. I immediately noticed that the screw that locates the coupling was loose and the coupling was spinning on the gearbox selector hockey stick arm. I tightened this up and borrowed a battery. This two was flat and again a jump start was needed. We went up to get gas in the cars and again the battery was still week. A Jump start got it going and we ran the two cars for about an hour and one half. I would have to check the battery the following day after our run.

There is nothing to describe the adrenaline rush of driving a buggy on the road and every time i do I get a huge rush that lasts a couple of hours afterwards. I was so happy to have my buggy on the road and although still had to improve the engine running and quieten the exhaust . My Bug Jam ticket had been booked.

Sucessful MOT and miscellaneous engine and steering issues.

14th July 2011

I had took my buggy into Leaders my MOT station at 10:20am on Tuesday 12th July 2011 . To be honest I had to nurse my engine all the way and eventually arrived on time. The MOT went fairly well but my wheel on the nearside was hitting my chassis and a rear bearing nut was loose so initially my car failed on two points which I felt was quite good considering the car had been into complete bits. I corrected these small problems quite quickly the Steering box on my new beam had no stops and it had been bolted in with the stop on the front working but not on the rear. I unbolted the steering box and rotated it. This was much better and I tightened the rear hub nut . My buggy passed the MOT that afternoon.

When I got the buggy home I realized I had not torqued up my Torsion Arms I torqued the Allen machine screws and the locking nuts both to 33 kg/ft 4.5 kg/m. I had noticed that one of the arms was pulling out. Once torqued these felt much more solid.

Now anyone knows who has built a car and has just got it running on the road, this is were the real problems start to be ironed out. My engine was not running very well and I decided to change my distributor back to an Bosch 009 unit as this had run on a car before. This improved the engine somewhat. I then re-timed the car at 30 degrees advance at 3500 RPM . Again there was another small improvement in performance. I then adjusted the linkage bar as I had noticed it was a pulling more on the drivers side carburetor bank. The car seemed to be a little happier.

My Fibrefab SWB RAT 1600 Twin Dell DRLA 40
with Engle 110 cam


I took the car onto some rough ground to see how the suspension handled. The car seemed to run quite well. The next few days would be a constant battle to improve the cars performance tweaking the linkage kit and trying diagnose the problems with my SVDA distributor. Would all these issues clear before Bug Jam 2011 and my car be capable of making the trip.

Fitting Spot Lights

11th July 2011

I had purchased some Spot lights on Ebay that where listed as stainless spots only to find that when they arrived they had been listed incorrectly and where chrome plate . I was a little annoyed at this but felt as I had paid such a low price I would not benefit from returning them to the seller and decided to fit them.

The lights came with earth wiring so I was able to run a short 27amp wire from the earth point for the headlights that both lights could share. I placed two switches in the dash so that the spot lights could be turned off saving the battery I bought these from a small company called "Car Crazy" these fitted through a 10mm hole. I was very pleased that matched the VDO gauges quite well.

I had researched the wiring and felt that I would be best to wire the lamps up with a relay. This would also mean that I could easily rewire them to come on with the main beam only by swapping one wire. I ran a feed from the fuse box to the switch and a earth from my earthing block to the switch. I then needed to get some of the 6mm female spade connectors with a hook on them. I found these on Ebay and was able to solder wires onto them I new I needed short 27 amp wire from the fuse box to the relay and one 27amp wire to run to the lights . I used 8am wire to provide a earth to the relay coil and my switch output was wired to the other side of the coil. These spade connectors where then connected onto the relay on their respective pin position. This enabled me to then take a wire off at a time note its position and push it in to the fuse box. When all four wires had been pushed in the relay could be put in position. I then ran the main feed wire from the relay down the front of the car alongside the wiring for the headlights . I decided to place a connector here so the the lights could be removed. I wired up the lights to these two connectors so that I could try them out . They functioned well with the switch. I decided to then change the wiring the main power feed to the switch instead of powering it from the fuse box bower fuse two I moved it on to the high beam fuse position . This meant the spot lights would only come on with high beam.

My M.O.T was booked for the coming tomorrow I was anxious to know what this would find.

To Low, Beam Spindle choices

9th July 2011

My MOT was becoming very close and my suspension was appearing to drop when I took the car out onto a bumpy track. The syptoms where very strange as if i used the adjusters to set the ride height of the car so that the wheels did not come too close to the wheel arches, the car would eventually return to sit25mm under the arch. This gave no room for suspension travel and I was finding it hard to understand what was happening. I decided that I would remove the dropped spindles and replace them with the spindles from my old beam. sent the spindles off to have them blasted and zinc plated and received them back four days later.

Whist I was waiting for the spindles to be returned I decided that I would cut an inspection hatch into the tunnel so that the process of changing clutch cables could be achieved without having to take the peddle set from the car. I marked the area onto the tunnel and cut the bitumen off of the area . I then cut a hole above the accelerator lever 70mm x 55mm with an angle grinder. I found it easier to cut the corners by drilling out four 8mm holes first. This have me a nice rounded edge that was kinder to your hands. I cleaned the edges with a hand file and The hole was directly over the clutch lever inside the tunnel. I made a stainless plate approximately 20mm larger on each side to cover the hole. I drilled a hole in each corner to take an 8mm bolt. I then bent the stainless sheet with a towing bar in a vice to make the curve profile that would be the same as the tunnel. I then used the stainless cover to mark out a further area on the bitumen this was removed so that the stainless cover could fit flush onto the tunnel I then drilled through the cover plate into the tunnel with an 8mm drill . The cover plate was removed and the holes where enlarged to 12mm so that a spirulux nut insert could be fitted.When all four of these where fitted the cover plate was bolted onto the chassis.

My Spindles had turned up and I was all but ready to fit them onto the car when I noticed that my EMPI long travel ball joint covers where breaking down and had gaping holes in them I was amazed at this as they had been fitted less than four months ago . I contacted my supplier Cool AIR VW and happily they agreed that the ball joints covers where faulty. Cool AIR VW agreed as a kind Gesture to upgrade my cobbers to the German High Quality BTT ball joint covers. These arrived quickly a few days later and seemed to be much thicker rubber. Could not however fit the spring retainers that came with the BTT covers as they where so strong they looked as if they would cut the rubber cover. I opted to use my existing spring retainers as these fitted much more easily but where very secure.

The picture left shows them fitted onto the car.

I then was able to fit my spindles, disk and wheels. These fitted back with no specific problems . I was pleased I had removed the spring located at the back of the SWAY AWAY and thread locked it in place.

The Car was then left overnight on its wheels . The following day it had not sunk down on the suspesion and seemed to be set at about 3" or 100mm of gap between the wheel and the tyre. I phoned and booked a MOT for the next Tuesday and was looking forward to having the car back on the road. I thought I might tackle the front spot light wiring before this as I felt it would be good to have them working.

Facet Pump Problems

1st July 2011

My new Facet fuel pump arrived a few days later and I fitted it into the buggy in several different locations. It was soon obvious that having mounted the pump on the engine that the pump was not capable of pulling fuel from the tank. It seemed as though the only way it could be made to work was to site the pump under the tank. Although I had previously wired pump electrics into my wiring whilst rewiring the car this was really intended to run a much higher pressure injection pump. I had also placed in place the brackets for this so I was not very happy with placing this pump in this position especially as a lot of this would need to be removed. I decided especially as this was supposed to be a quick fix that my only options was to replace the stock pump.

It is important to realize when using the electric pumps that the Facet range are only PUSH pumps ans not PUSH-PULL like the original equipment. These means that placing a Facet Pump is vital as the petrol acts as a coolant to the pump. even the basic pumps will seem to pull up petrol but will not provide enough fuel and will in my experience eventually burn out.