Search This Blog

Choosing a dash board layout

21st July. 2005
I started to do up the buggies dashboard by stripping the multiple layers of paint from it with wet and dry silicon carbide paper. The process was lengthy but the result was good and I was soon able to have a nice finish on it to start designing my new layout. There where already several holes that had been cut into the dashboard principally for one dial a steering column and another curious hole that was unknown. I started by grinding out the holes so as to get a good key for my new fibre glass to get a grip onto. The result was good and i started to fill up the holes and fill in from the back. The fibreglass was then sanded down to a fine finish.

I came up with five designs for the layout of the new dash boards dials and submitted them on a forum on http://www.beachbuggy.org.uk This was especially useful as the whole buggy group helped and gave comment. The options where as below:
Choice A though to Choice B.
Choice C The MOST VOTED, through to Choice D

Choice E.


The most voted choice from these was layout C which scored the highest number of votes. I had made the layouts to fit around six gauges 4 x 40mm sensors : Fuel Tank;Pressure, Volts; Temperature, The two 80mm gauges where a speedometer and rev counter. These where all VDO and came from the the Classic range.

I bought two Starrett hole cutters and an arbour which they fitted from Travis Perkins in Cranbrook , these worked out to be quite cheep at around £14 for the smaller ones and around £19 for the larger. I marked the position of the dials according to my template and cut the holes. The Starret hole cutters where wonderful. I had previously used them to cut the hole for the petrol filler so new they cut beautifully. The new holes look great.

I had decided much earlier that I wanted a stereo and as I knew I would have to build an area for this I thought it would be a good idea to build an area to take the hazard light and light switch at the same time. The finished dash board although it was in need of a respray looked great. I was so pleased with it and just had to add some indicator bulbs for high beam; indicators and alternator and it was finished.

I was now looking forward to rubbing down the paint work on the tub and cleaning up the bottom painting it with a fresh gel coat.

I would be doing this next and had been out to buy new supplies to start the next day with.


A solution, or an impossible task

9th July 2005.

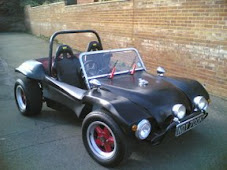
Whilst creating my eBay post on turbolister I was searching for a suitable category in which to advertise my Beach Buggy Chassis, I came across item number: 4561230995, this was listed as a project beach buggy kit car and was located in Basingstoke. It had started at £50.00 and was soon up to £200.00 and had 5 bids. It was just the tub, roll bar and front bumper. The seats the wheel rims and other items where unusable.

The front looked amazingly like an American car the Corvette. I fell for its looks immediately. The only problem was a severe lack of time, 3 1/2 months before my family moved and if i took this leap of faith then I would have to have the whole thing rolling/running by the 26th October 2005. On top of this I had to win the auction something as of late I had not had much luck with.

During the course of the last 20 years I had tried twice unsuccessfully to purchase the GP Beach Buggy body top. The first was faltered as when I approached GP the company had been sold. The second time 29 June 1999 a gentleman called Adrian House in Aldershot had purchased the moulds and was able to supply the parts I sent him a cheque in the post with a list of items that I required and the letter and cheque went missing in the post. By the time I had allowed for postal times, stopped the check and contacted Adrian. The company was in trouble again and I believe he no longer had the moulds. My GP Beach Buggy had passed me by, however a new dream a corvette look a like beach buggy was sparkling on the horizon.

Bidding on ebay is a art form so my friends told me you have to sit and watch the auction until as near as the end you humanly dare and have another window set up with your bid ready to go at the press of a button. This is ok until its something that really matters. I had decided that I was going to give it a shot. I new I could afford to work for 5 months on the project and if I had not made enough progress the project could still could be sold. There was a glimmer of hope and the anticipation was immense as I watched with Catherine the time tick by and the auction remain at £200.00. As the auction reached its end time the bids slowly started to rise and each time I stood cool and waited 20s from the auction end at 10:33pm the race was on, amazingly even though I thought I had lost the auction I had won it by 1p.

Cash in place I need to find a way of transporting this from Basingstoke to Kent. Would I be able to get the item moved and would every thing fit in place.

The personal choice

1st July 2005.
The summer of 2005, brought with a lot of change in my family and a lot of change in my life.

I had met my partner Catherine in June 2004 at Gatwick after a long courtship on the phone. I had been courting her for a year at her home in bexhill for about a year when my my father became very ill, he had slowely lost wieght and become very introverted it had taken a push to get him to the doctors as he had always been the main staple of my family, times where changing and some serious choices had to be made. Some of them ones that I was not going to like as I could find no new garage for my buggy to reside in. I had six months before my family had to move out and I must confess my partner Catherine was the only one that kept faith even when I was despairing. 20 years had past and the dream that had started so long ago with my father was fading fast.

I took my beach buggy chassis and engine out of the garage and washed off the years that sitting in a garage had accumulated. The dust came off very easily with a hosepipe and my hard work with my paint work had paid off.
The reason for cleaning up the chassis was a sorrowful one. My parents where planning on retiring as my father was diagnosed with cancer and the family home was to be sold along with it my garage that housed my buggy chassis.

The reason for the pictures where that i was planning to sell the chassis on eBay and write the whole project off.

What would happen next would I find another solution? Would the chassis not sell?, or would it not even make it onto eBay?

Revolution Alloy Wheels and a small Corsa

30th June 2005.
My Ebay luck was holding out I had won my tyres and wheels for £205.00 for the complete set. I rang Ben in the morning and arranged to pick him up on the way as we where going to head into central London and with the cash I was carrying I wanted to be sure I was not going to be robbed. The journey into London was quite good and we arrived outside the seller’s block of flats and rang the door entry system corresponding to the flat. A young man came down and said he had the wheels in his garage loaded in the car and would bring them round. The car came around and he unloaded them off the Car.

They where perfect! I new the minute I saw them they were just what I had visualized and asked him about them. He said that he was once going to build a Beach buggy for his partner but had decided to build her something different so he was selling them. I agreed to purchase them and with Bens help we squeezed them into the back of my Vauxhall Corsa. They only just fitted. We soon where on the way home and made good progress returning home at around 9:00pm.

I wanted to try them so we off loaded the car and I went out for beer and Ben started to fit the new wheels onto the Chassis. They had come with some rear spacers to space the rear wheels further out by 1 1/2".

The wheels bolted on with the bolts he had given us, but we had already known one of the front bolts was missing. This was to turn into a long search to find a replacement that eventually ended in me having to have one made out of stainless steel at a local engineering company. The pictures where taken on a mobile phone so are not very high quality.

Wheels Technical:
Revolution 14 3A Red HR - 5 spoke painted.
tyres : front : BF Goodrich all-terrain, 215/75x14.
rear : BF Goodrich all-terrain, 265/50x15.

Front disk conversion.

29th June 2005.
I had decided much earlier in the chassis rebuild that I wanted to change the braking system on the buggy as the improved engine and the lighter chassis would enable the buggy to perform at higher speeds. The benefits of fitting disk braking to the front of the car are well known and it is fairly common in the world of motoring to fit this combination in commercial vehicles. It has been proven that disk braking systems provide better continuous braking as they dissipate heat better than drums and they are also less likely to have brake fade than drums.

Changing the braking system was going to be an expensive option as the conversion kits that are advertised vary in price and in quality. I decided to try and locate 2nd hand camper van front spindles, disk and callipers as one whole unit one for each side. I located these in a beetle/camper van repair workshop and paid around £20.00 for the pair.

The braking assemblies where taken apart and it was apparent immediately that the disks needed replacing and the likelihood was that the callipers where seized as well. This meant that I would only be able to salvage the spindles and the backing plates from the setups. I cleaned the spindles up and repainted them and sent the backing plates away to be zinc plated by the hot flame spray process provided by AC Blasting in Flimwell, East Sussex. When they returned I was able to bolt them on to the clean painted spindles.

I bought the Disks and new bearings from Ajay car components. They provided them on a next day delivery service. The callipers I found were advertised on eBay and had been sitting on a garage shelf for the past 5 years on eBay Item No 4578950519 for £67.00. They where in very good condition and just needed painting with calliper paint and they where ready to go.

With the new disk spindles kits made up, it was time to remove the front brake drums and spindles. These are connected by ball joints to the front suspension arms. Fortunately I new these bearings had been renewed recently so the old spindles could be unbolted and the old component replaced with the disk version. The spindles where bolted in at the bottom first and the lower suspension arm was jacked up with a small trolley jack until it met the top suspension arm and the top ball joint fell into the top hole of the spindle. It is important when doing this conversion to remember to leave the brake fluid cables attached to the old drums. This prevents spillage of brake fluid. Once the new disk spindles where in place the brake fluid lines could be unscrewed from the drums and screwed into the disk calipers. This was repeated for each side.

Once the disk spindles where in place the whole brake system was bled to remove any air that had entered the braking system. The brake fluid level was checked and topped up.

Brake Technical:
FDB732 Premier Brake Pads TAR732
*826911 Brake Discs
*FPSFBK041 WHEEL BEARINGS
4578950619 VW Beetle new brake callipers

New engine parts and fitting to the chassis.

27th April 1992

After several shopping trips to Limited Edition in London. Purchasing parts to finish the engine and parting with a fair amount of cash, my engine finally made its way back into the prepared chassis.

With the short block repaired and new connector rods , piston rings and clyinder heads all added. The finishing touches (The shiney stuff) were purchased and added as they each arrived by securicor post up until 24th March 1993.

My funds suddenly took a plummet along with a serious relationship (Well not so serious now) and my job. My chassis and engine slummed it in the garage, whilst i recomposed and rebuilt my self. You could say that this restoration has not only been about the beach buggy. It is quite possibly a rebuild of my life too.

Several birthdays past by with small additions being added and a wiring harness was purchased as a present from my parents and purchased from GP Beach buggies .

I was not to know it but this would be the place my dreams where to be put on hold: The wiring harness turned up on the 11th january 1993.

The complicated number of seemingly hundreds of wires with nothing to connect onto became I must a admit daunting and i started to lose confidence.

Luckly my parents garage was huge and my dream could sit patiantly waiting until another day when a huge personal choice had to be made.

Would this be the end of my dream or would I recover my life suffieciently to feel comfortable enough to re store faith in my dream and bring my restoration to a climax.