 11th June 2011
I had been lucky enough to purchase a Paris Beetles Roof conversion for a beetle and was hopping it could be made to fit my buggy. It was immediately noticeable to me that the hoops that where originally for the beetle conversion seemed to fit ex
 actly around the outside of the buggy rear seating area. The top hoop rose high above the roll bar and seemed to be a good fit. This seemed very strange as I could not understand for one instance why they would be the same as the buggy was considerably smaller than the Beetle. I fixed the hoops in place and started to put the roof fabric onto the bars. Found that if I pulled the roof out to the rear of the passenger seat are that the hood seemed to fit nicely around the rear of the car with out much overhang than you would normally expect. This was as you can imagine becoming a little surreal as I was starting to believe I had discovered a cheap solution to fitting hoods on Beach Buggies knowing that most of the Beach buggies body's where historically derived from the Manx buggies. I started by fastening the poppers to th
 e rear apron. I used 4mm stainless bolts to bolt them in position using the center button on the roof to start I worked using the position on the fabric and then the relative position to the body to ensure my button positions . This meant that with the roof not fitted the studs ran evenly around the back of the buggy. This seemed to fit as if it had been made by a custom hood company I was amazed. i fitted the hood to the bars and to the rear clipping it round I pulled the roof ward to the windscreen and clipped it onto studs that screwed onto the window frame . I the cloth was quite baggy but still service ab
 le. I decided that if i wanted it tight on te buggy I would need to loose some material from the front. I found that the rag top was 16cm to long. I noticed that the seam at the front was quite simply constructed . The edge had been bound with fabric and the button poppers had all been sewed to a piece of fabric , which then had been sewed to the roof This looked quite easy to replicate so I started to disassemble the front of the hood by un-stitching the seams with a sharp pair of small scissors. Some time later I had the pieces apart and I had the fixings on one piece the edging and the bare front of the roof assembly. Prior to removing the fabric with the studs on I
  had marked its position with chalk to give me a reference from the original length. I used these marks to measure and draw a chalk line on the underneath of the roof fabric so that I could measure back 14cm the distance from the buttons to the edge minus the reduction i needed. This meant i needed to remove 14cm of cloth from the edge I used a chalk line to draw this cutting line on the roof and set about cutting it off. I noticed th
 at the fabric with the poppers on only had one straight interface edge on it and used this edge on the front of my new cut edge. I used the center button to locate the position of this strip placing it in the center of the fabric. Do not assume that the length of this is the same on each side as mine was not and the center reference popper is a better position marker. From some previ
 ous experience with trying to sew leather clothing I new that a normal sewing machine would not cope with the thickness of the material . I decided to take the roof to a dry cleaning company that I new had a strong industrial machine. They agreed to sew the three fabric pieces together for £15.00. I picked up the roof a few days later
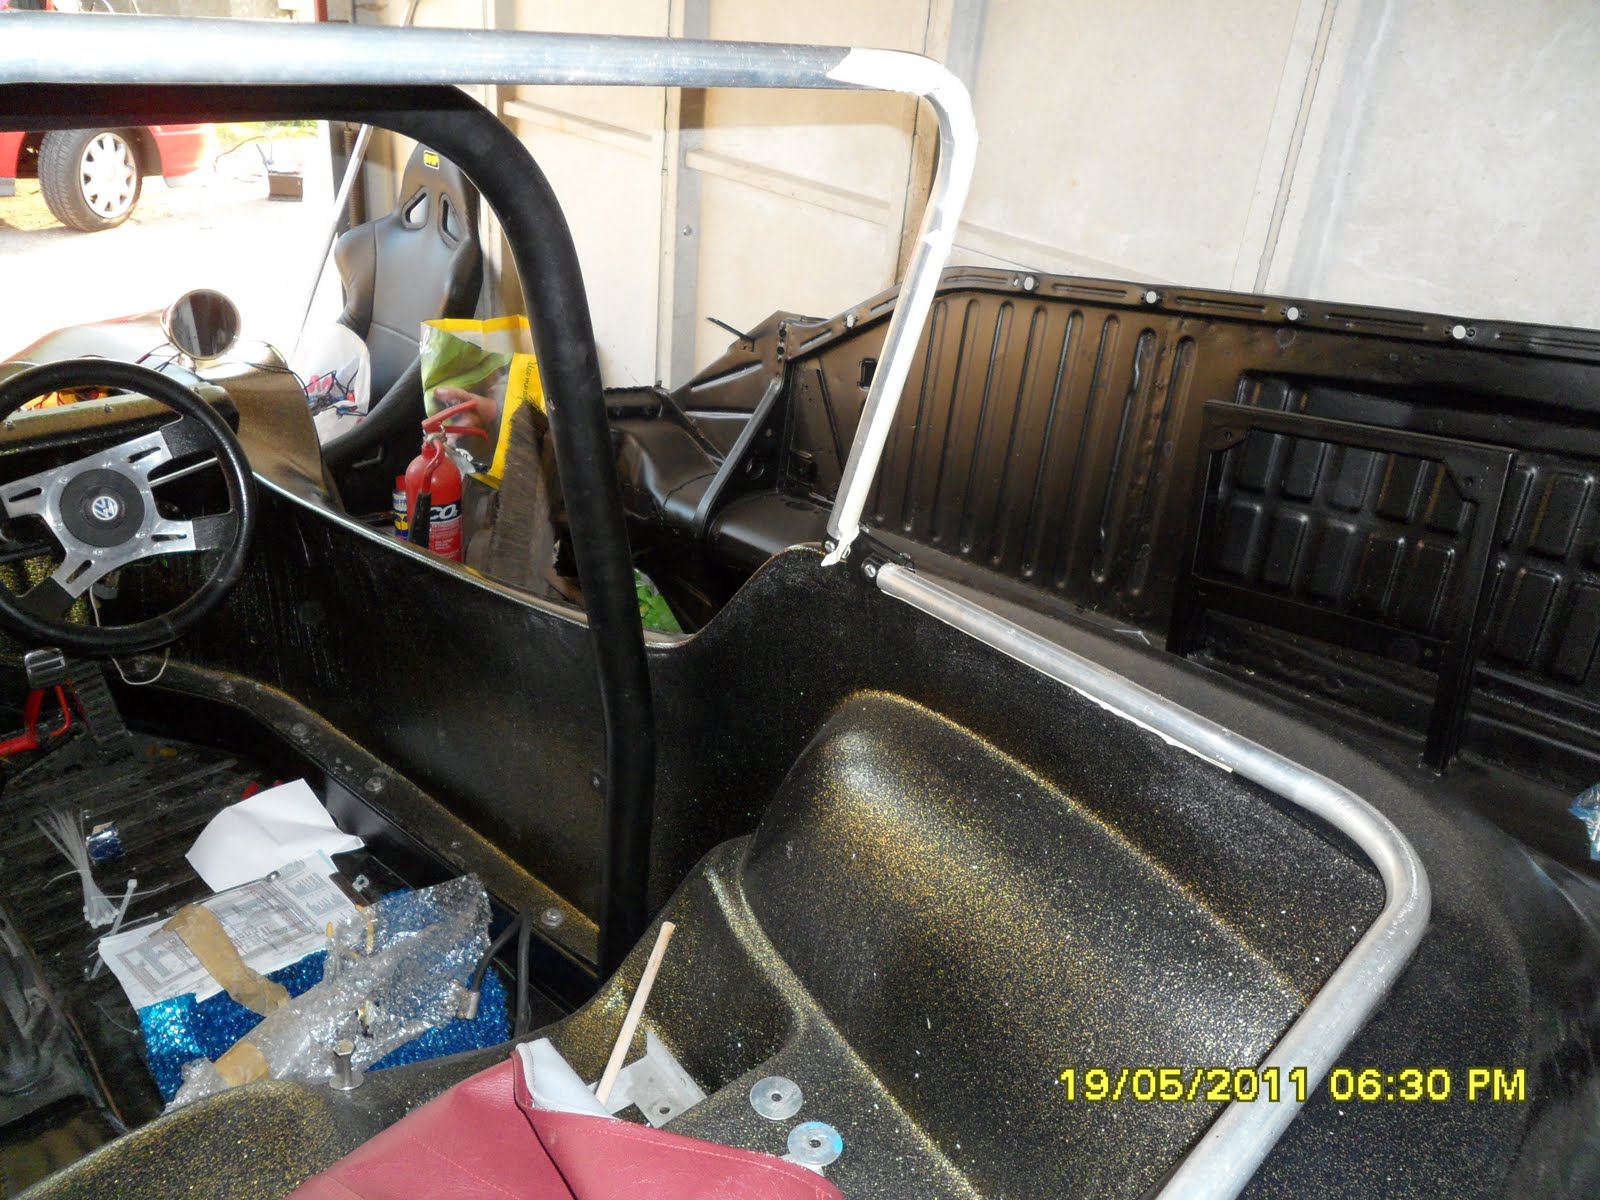
 . The roof fitted perfectly. I was amazed. The head height was superb and I could easily sit in the buggy without banging my head on the roof. I put the seats in place and you can see how much head room is available with the extra 80mm of the body lift working fantastically. I was amazed that from a £50 purchase on eBay plus the £15 sewing costs that I now had a roof that would have cost me in excess of £1000 pounds to have made.


My spouse and I absolutely love your blog and find many of your post's to be precisely what
ReplyDeleteI'm looking for. Do you offer guest writers to write content for yourself?
I wouldn't mind producing a post or elaborating on some
of the subjects you write related to here. Again, awesome blog!
I think that is one of the so much significant info for me.
ReplyDeleteAnd i am happy reading your article. However wanna observation on some basic issues, The site style is perfect, the articles is truly great : D.
Excellent process, cheers
Hi there friends, fastidious paragraph and nice arguments commented at this place, I am actually enjoying by
ReplyDeletethese.
Greetings from Colorado! I'm bored to death at work so I decided to check out your blog on my iphone during lunch break.
ReplyDeleteI enjoy the information you provide here and can't wait to take a look when I get home.
I'm shocked at how fast your blog loaded on my cell phone
.. I'm not even using WIFI, just 3G .. Anyways, fantastic blog!
Thanks very interesting blog!
ReplyDeleteI could not refrain from commenting. Well written!
ReplyDeleteWhat's up to all, for the reason that I am truly eager of reading this blog's post to be updated daily.
ReplyDeleteIt consists of pleasant data.